This past week, I made a robotic arm that tracks your hand in free space using a Leap Motion, Arduino, and node.js. It tracks my hand very well. It is able to pick up stuff and set it down with relatively good precision, although there is definitely some room for improvement. I can’t pick up anything too heavy with it (mainly due to the gripper limitations), but it’s a good first try. See the video below:
I’ve spit this tutorial into two parts. This part 1 (you are here) deals with building the hardware. Part 2 deals with the software implementation. Let’s get started!
Hardware
I built all of this in the kitchen of my studio apartment in San Francisco. Unfortunately, I did not have access to any sort of workshop, so I had to use whatever I had lying around. I ended up ordering a few things from Amazon. The tools I used are as follows:
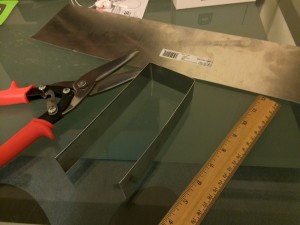
- Aluminum Scissors
- Drill Set
- Clamp
- Ruler
- Sharpie
Additionally, the materials/components I had to buy to get this thing working are:
- Arduino
- HiTec HS-422 Servo
- HiTec HS-755HB Servo
- HiTec HS-81 Servo
- Radioshack “Standard Servo” or HiTec HS-311 Standard Servo
- Screws: #2×3/8″ screws (with nuts) for most things, and one #8 screw for the opposite-the-arm side of the big servo
- Aluminum sheet. 6″x18″x0.025″
- Wood
- Lynxmotion rotating base
- Leap Motion device
I bought a sheet of aluminum (0.025″ thick) and used the ruler and sharpie to figure out the dimensions of the arm. I then set about cutting the aluminum with the aluminum scissors (be sure to use gloves and eye protection since the aluminum is sharp). After the cut, The aluminum can be bent by hand, since it’s relatively thin. Push any corners that aren’t straight against your table to flatten them. We want to get the piece as flat as possible.

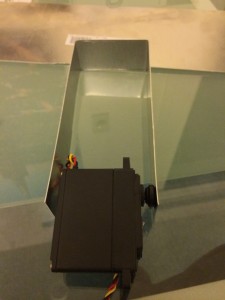
After that, we want to bend the piece of aluminum so that we can have some semblance of an arm section. We’ll bend the piece twice to get that in place. To make a sharper bend, use the ruler. Press the aluminum against the table and pull it up against the edge of the ruler.
Align the servo arm holes to the metal and mark the spots where you want to drill holes for the servo arm screw to attach to the aluminum arm section. Drill holes there.
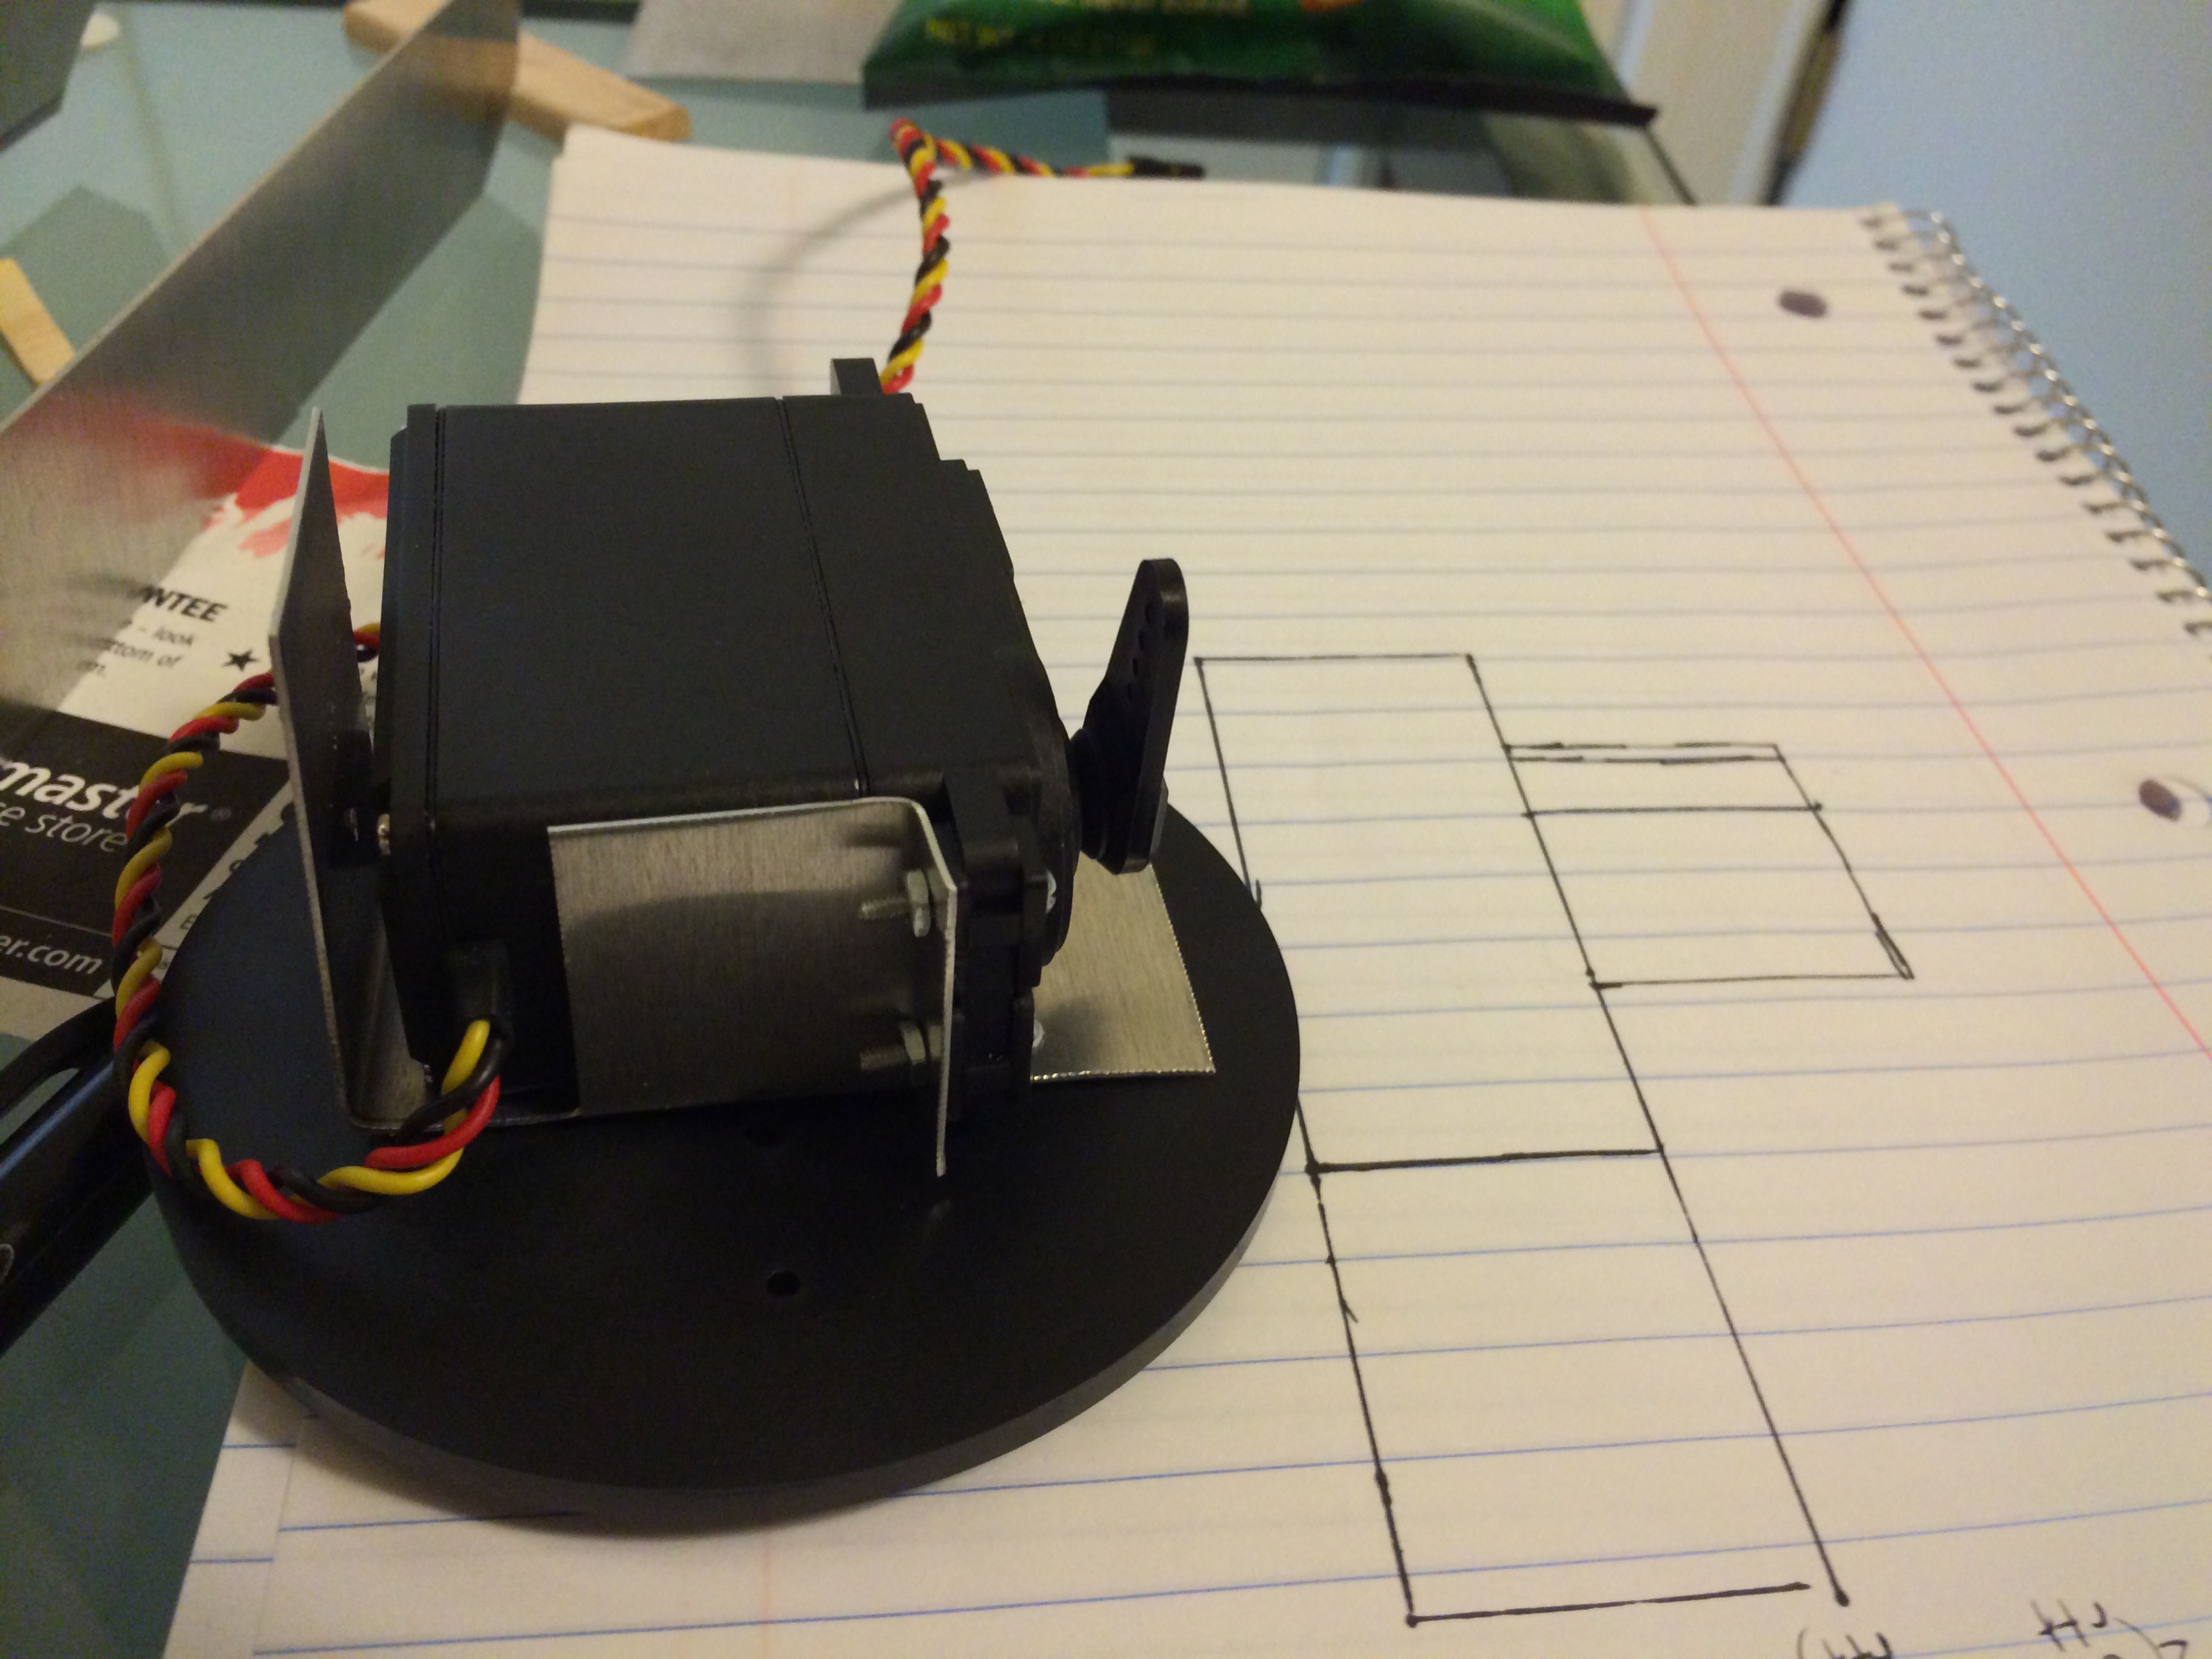
Before coming up with a design for the servo base attachment plate, you need to see what your servo’s range of motion is. We want to make sure that at the 90 degree point, the servo arm points up. The design I came up with is sketched on this piece of paper:
After that, creating the next arm section is similar, except we want to make it shorter and thinner for two reasons. One, less weight. Two, the end effector (gripper) will have some length as well, and we don’t want to have an out-of-proportion arm. That would look ugly.
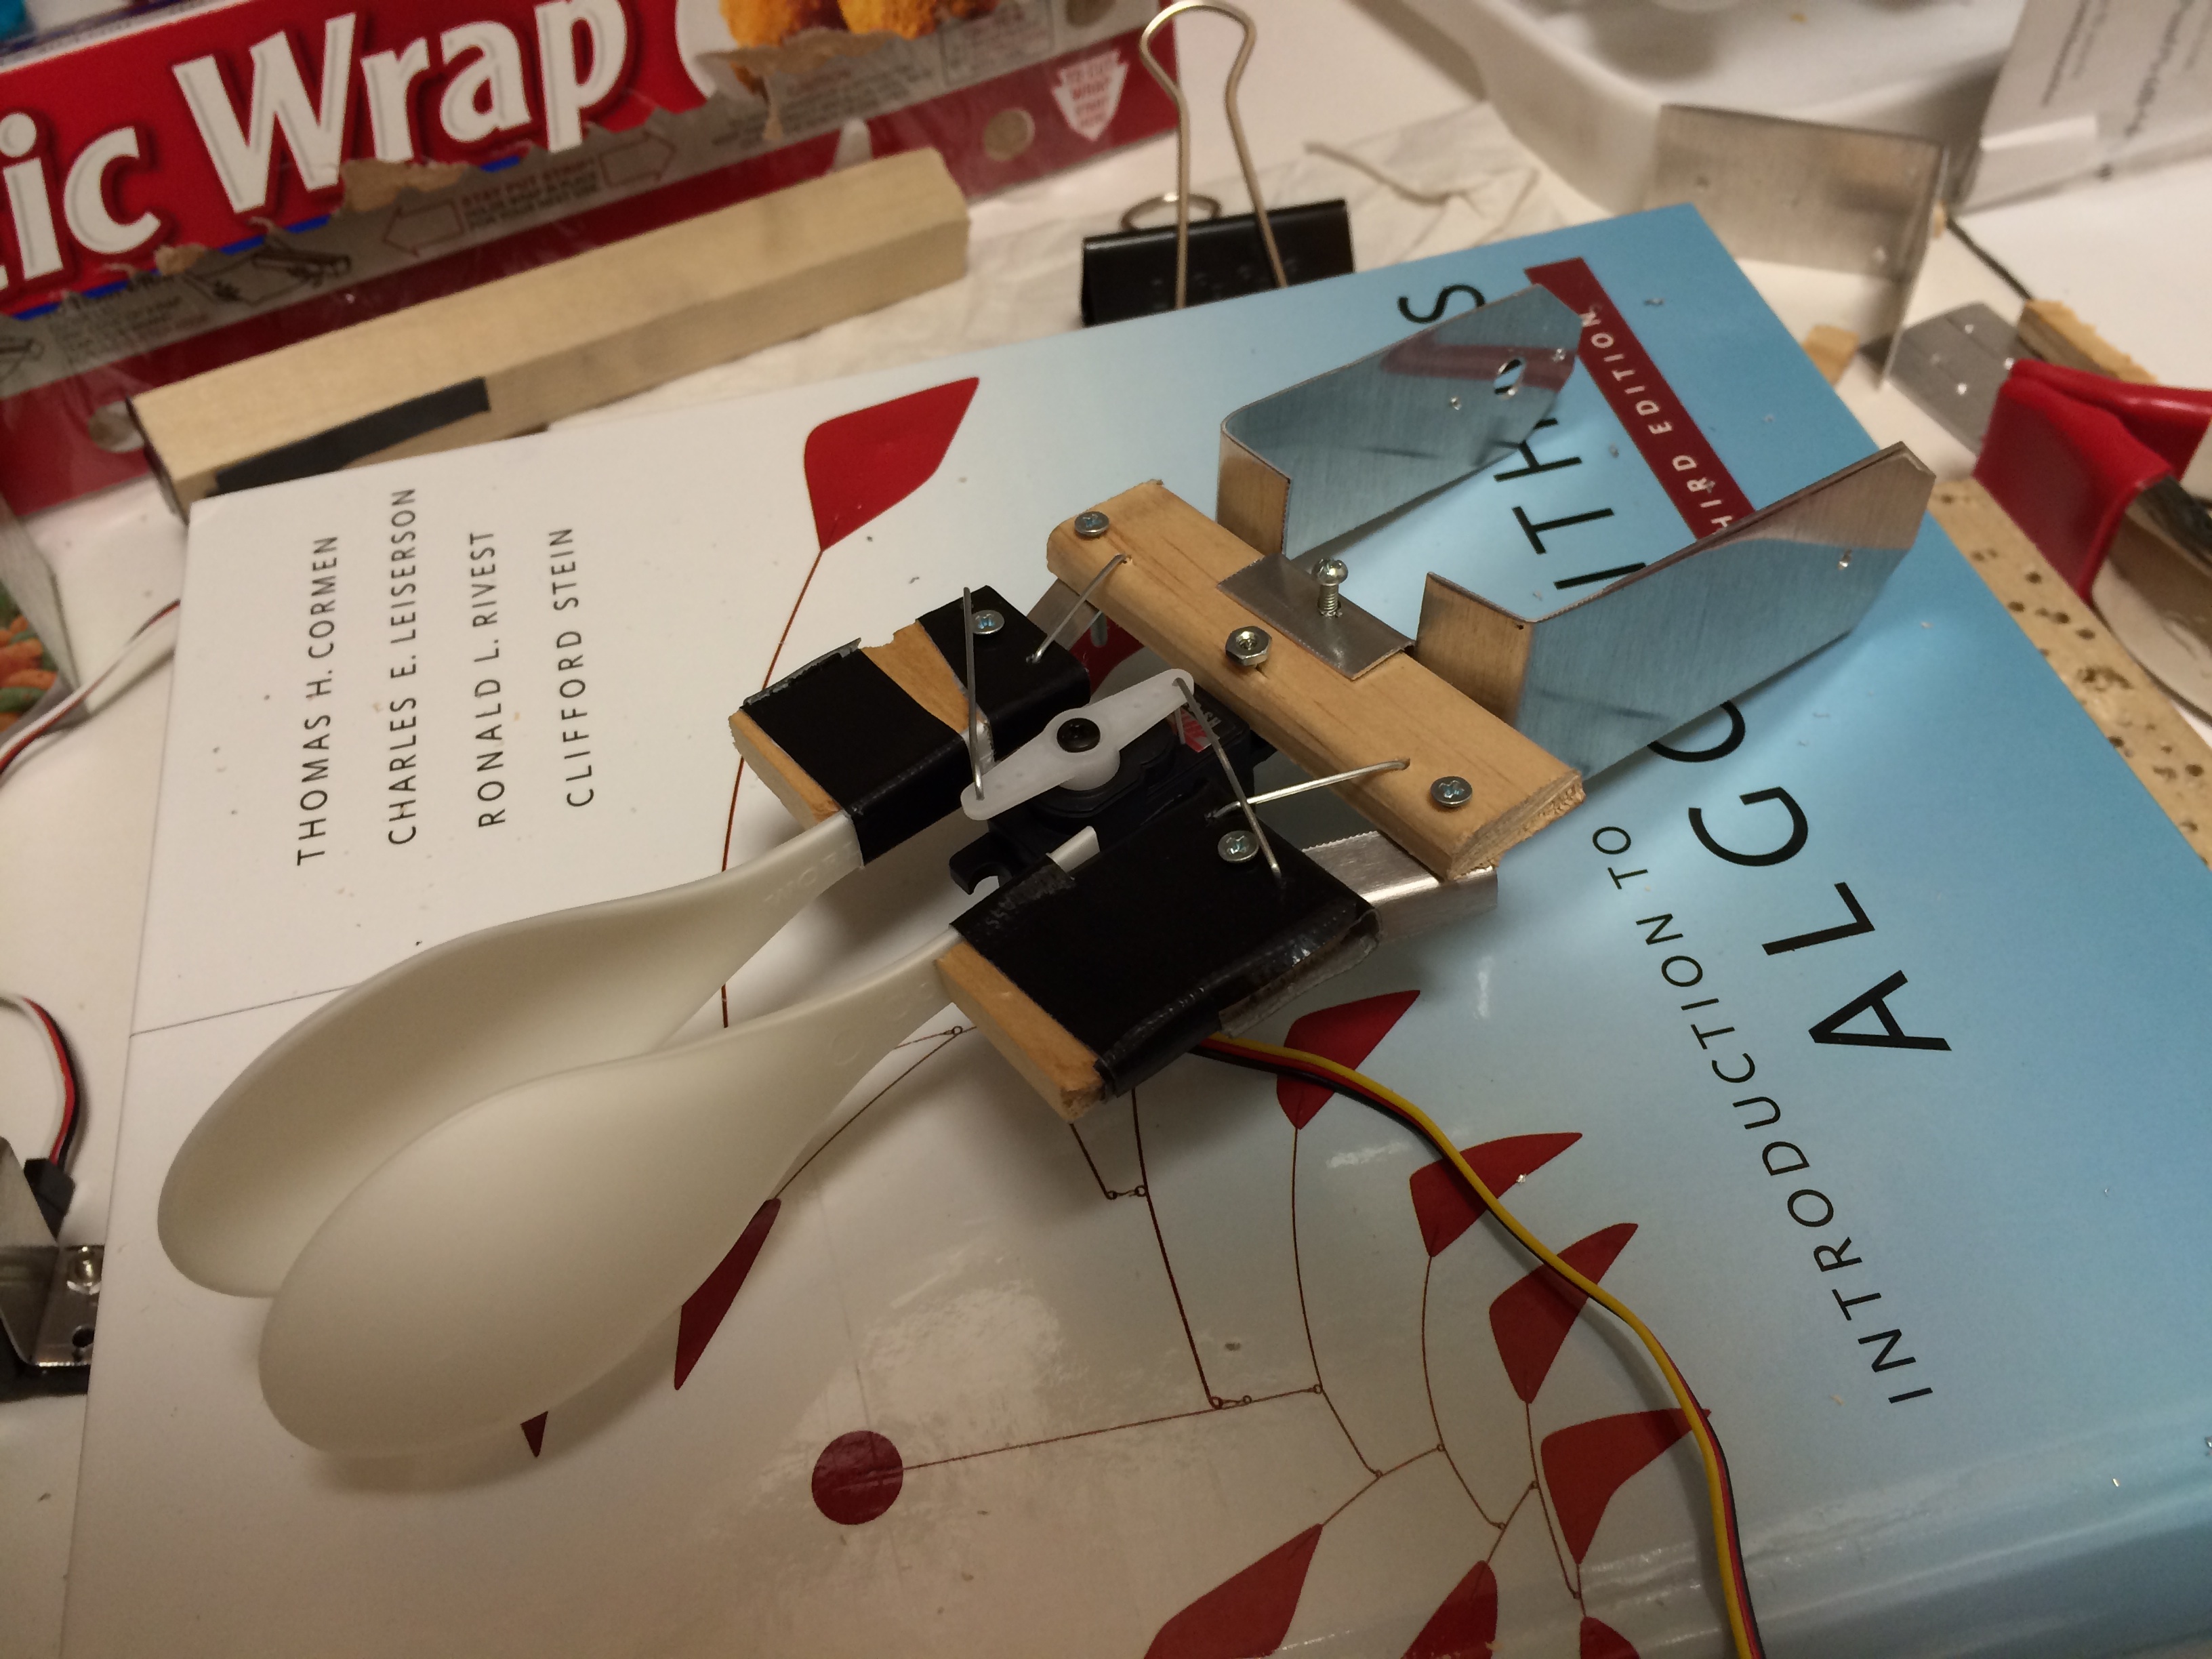
The end effector is a relatively simple design that mimics the following design I saw on youtube, except I used aluminum for the joints and paperclips to keep everything in place. Here’s the youtube video:
I tried using wood, but the pieces were too thin and I split them when I drilled the holes. Here’s the final end effector that I came up with. I used plastic spoons because I didn’t have anything else lying around. Here’s what it looks like after I put it together.
And then the rest of the arm just comes together after some additional drilling of holes and aligning of pieces! Here’s the final arm (minus the wood board that I used to attach to the base).

That’s that for the hardware! Continue to part 2 where I will go into detail about the software and how to link it to your Leap Motion device.
July 27, 2013 at 6:52 pm
hey,
I made a robotic arm in the past much like yours but it was all software controlled (really dumb but you can see the images in my blog). I see you have done and excellent job and given it a new level or intelligence. Good work congrats.
The one problem I faced was, I didn’t know how to add a free running axle on the back side of servos so as to increase the stability. Anything I did with glue won’t last more than an hour. I was like out of time, so I had to deal with this by placing two servos back to back and giving one servo ‘n’ deg and the other servo ‘180-n’ deg. Could you explain how you managed to solve this?
Regards,
Siddharth.
July 29, 2013 at 5:25 pm
Hi Siddharth,
Excellent work on your robots; the end effector design looks much more solid than mine as well.
Basically, the way I solved this was to build a metal mount that runs down the side opposite the servo arm and place a screw there. On the arm shaft itself, I drilled a hole and placed the screw through both holes so that they would be fastened together. I put a nut to ensure the ends don’t slip away from each other, but I did not tighten it fully so the arm could still rotate.
You can see how it’s done by looking at the Lynxmotion robotic arm. Here’s a link to the arm, although you can’t see the back side:
http://www.lynxmotion.com/p-683-al5a-arm-no-electronics-kit.aspx
Here’s the bracket that they use for their servo:
http://www.lynxmotion.com/p-286-aluminum-multi-purpose-servo-bracket-two-pack.aspx
The screw basically goes through the small hole on the back side to attach to the arm section.
July 30, 2013 at 6:21 am
Thanks.. that was really helpful. Now I can spend more time over this project.
August 27, 2016 at 11:22 pm
hello sir,can u tell me what’s the torque u used in that motors
May 2, 2014 at 9:56 am
hello sir
i want make a robot kindly help me
August 25, 2014 at 6:14 pm
Amazing!! Last night I also made a little robot that tracks the movements of my hand with an accelerometer and 2 flex sensors. Now I will surely check the leap motion device.l!!
Video here:http://m.youtube.com/watch?feature=youtu.be&v=mDVJaJGJ814 .
Greetings from Italy.
Giorgio
November 2, 2014 at 9:40 am
hii…ma final yr project s the same…can u post the arm dimensions???
November 27, 2014 at 12:00 am
Hi,
Great project. I have it running on Windows 7 64bit and it works fine.
I have found after a while it will stop responding and moving your hand away and back doesn’t fix it.
The running values on the screen look wrong too
I did see an out of memory message at one stage.
Any idea’s?
Rod
December 24, 2014 at 11:48 am
hi.. can you put the diagram of how to connect the servos on the breadboard then then connecting it to the arduino.. thats my only problem it will be very helpful if u put the diagram or a bigger picture of the connections
December 25, 2015 at 4:08 am
I love what you guys are up too. This sort of clever work and
reporting! Keep up the very good works guys I’ve added you
guys to my blogroll.
January 20, 2016 at 8:23 pm
need help!!
February 26, 2017 at 3:41 pm
https://www.socialenvy.co/es/
I am truⅼy thankful to the holder of thiѕ website
ԝhо has shared thіs fantastic paragraph aat Һere.
April 2, 2017 at 3:45 am
hey,
I also made a robotic arm using leap motion sensor in my final year project and i use fingers instead of clip or gripper but there is a problem i have program my leap motion using C++ and it doesn’t work so I need your help . How to interface the arduino with Leap motion sensor using C++ .Could you explain how you managed to solve this? I see you have done and excellent job and given it a new level or intelligence. Good work congrats. I am waiting for your kind reply. Thank you.
Regards,
Ghazanfar
April 14, 2017 at 7:15 am
May you please post the dimensions of the Arm?
The code has Length= 160 mm. Is that the shoulder or elbow?
Thank you
July 4, 2022 at 7:14 am
Today my life is honest and true. I don’t have nearly
the material things I once did but what I have today is a
reflection in the mirror that I can look at
and feel good about it.