I built a robot that mixes drinks named Bar Mixvah. It utilizes an Arduino microcontroller switching a series of pumps via transistors on the physical layer, and the MEAN stack (MongoDB, Express.js, Angular.js, Node.js) and jQuery for the frontend and backend. In this post, I’ll teach you how I made it. You can follow along and build one just like it! I’ve also put the 3d model (blender), stl files, and the code up on GitHub for you guys to download. See the link at the bottom of the page. Here’s the video of the robot:
Navigation:
- Part 1: Hardware and Electrical Design (you are here)
- Part 2: Software Design
- Part 3: Operation, Caveats, and Further Modifications
First, a little bit more about the robot. The entire thing costs approximately $180 to make. All of the parts are 3d printed, so you’ll need a 3d printer to build this. I used the MakerBot Replicator 2X, but any 3d printer should do. Total time to print the pieces is about 18 hours, depending on your settings, and assembly wiring, and Here’s a list of parts that need to be purchased:
- 5x 12V DC peristaltic pumps
- 11x 5/16″ steel square 12″ rods
- Clear tubing
- Arduino Nano
- 5x TIP120 w/ Diodes
- 400-point breadboard and jumper wire
- 5x 2.2kOhm resistor
- 4x #6-32 2″ machine screws
- 10x #4-40 3/4″ machine screws
- 12V power supply rated at (or greater than) 1.5A – or you can use an old laptop power supply (as long as it’s 12V DC).
- 5.5mm x 2.1mm coaxial power connector (female) – or if you’re using a laptop power supply, 5.5mm x 2.5mm
- Male pin connectors
- Female housing for the male pin connectors
Other tools required for the job are: a hacksaw to cut two of the 12″ rods in half, a wire stripper, soldering iron, and solder to connect the wire to the pin connectors and coaxial power connector, and a multimeter to check your work.
For the first part of this tutorial, I’ll focus on the 3d model, printing, and assembling the physical robot. The second part of the tutorial deals with the code, and the third part will deal with the operation of the robot.
Design
Bar Mixvah is designed to use a system of 5 peristaltic pumps that are switched by 5 bipolar junction transistors (TIP120), all controlled by an Arduino, which itself is controlled by the Johnny-Five package on the node.js/express web server that is running on your laptop/windows tablet (or maybe Raspberry Pi? I haven’t tried). Having it on a web server allows users to order from any device, be it a phone, tablet, or other laptop that can connect to your WiFi access point’s internal network. Practicality-wise, maybe it’s not necessary. However, in my experience, people seem to enjoy ordering from a tablet that they’re holding in their hands more than a stationary screen attached to the robot.
The physical design of Bar Mixvah around the usage of 5/16″x12″ steel rods. I chose this length and size because they’re sturdy, readily available at your local hardware store, and not too big or small. They’re also relatively cheap at ~$2-3 per piece, depending on where you buy from. The problem with 3d printing is that it’s goddamn slow. If you want to build a medium sized robot like this one, it would take days to print all of the necessary parts. In fact, you don’t even need to print these parts; you could fasten them together using plenty of other methods. However, I don’t have access to a metal shop, am a terrible welder, and wanted a friendly looking robot, so I chose this combination of 3d printing the joints and connecting them via metal shafts.
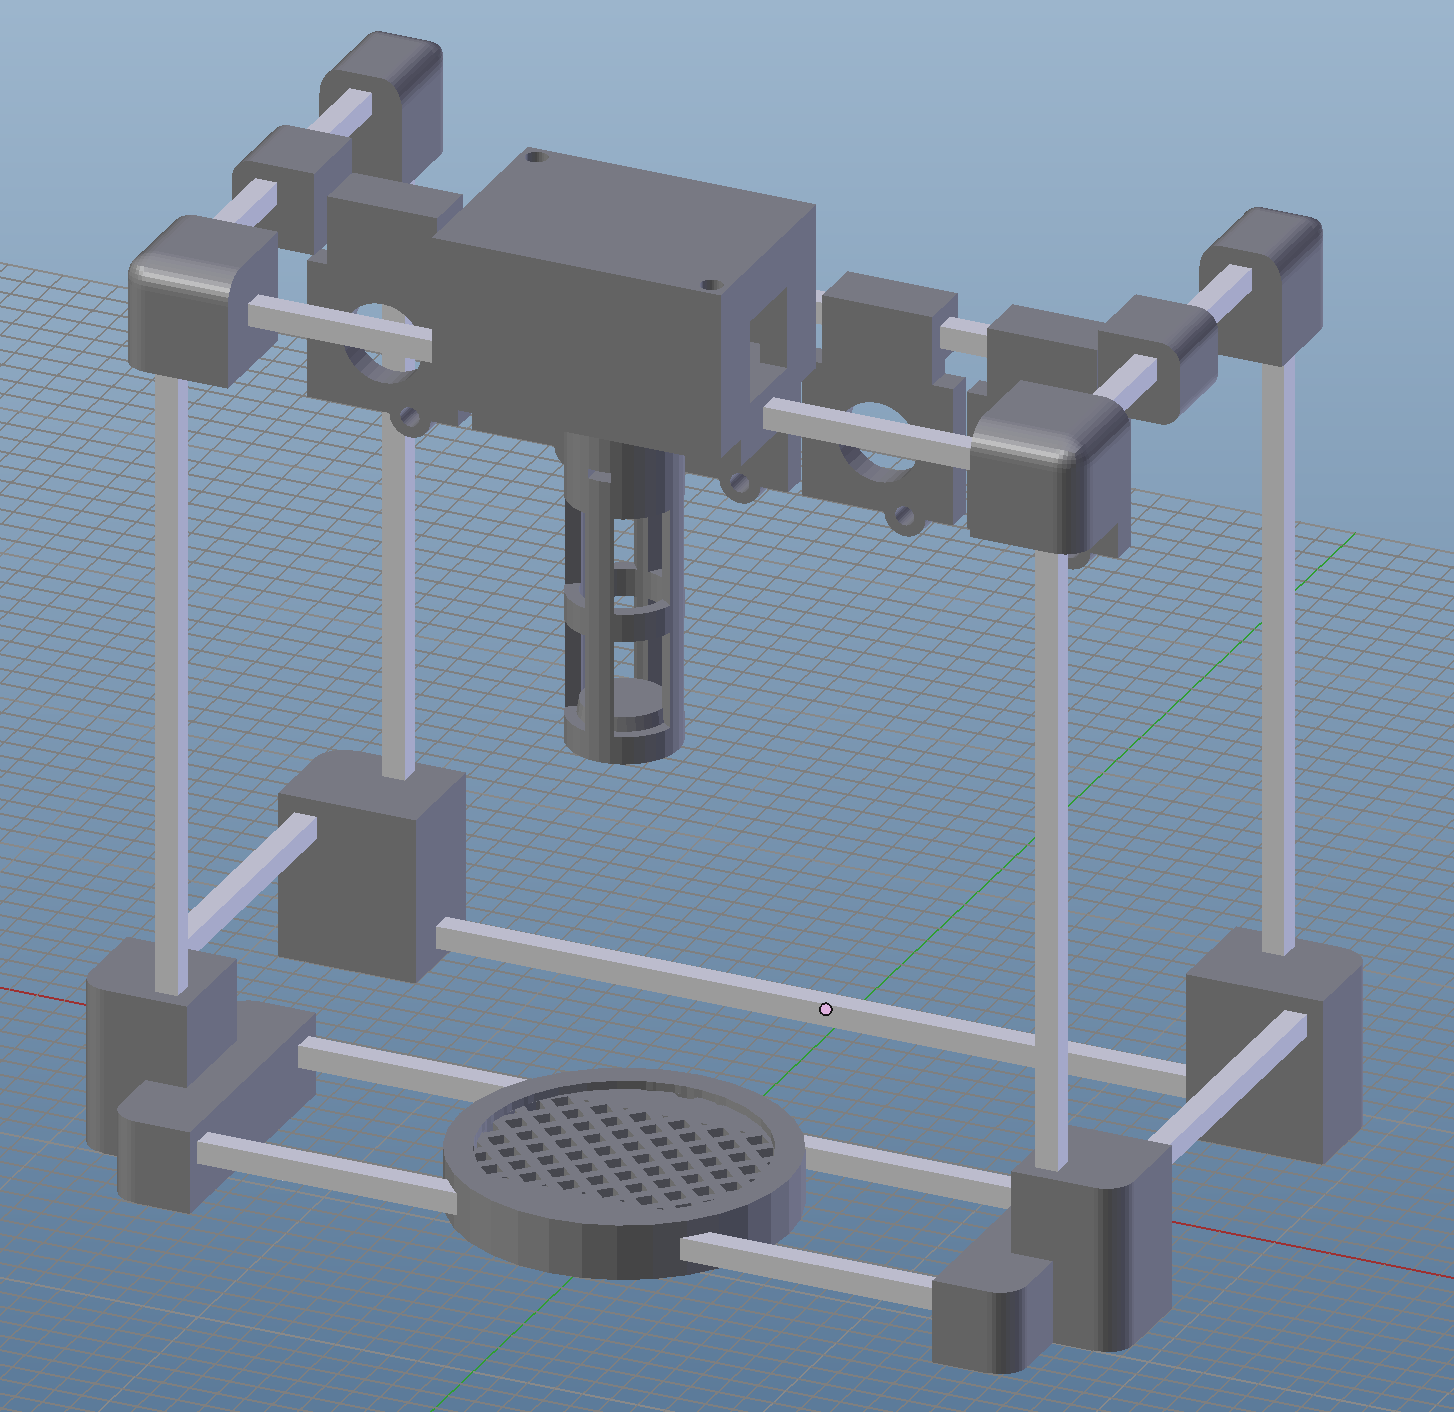
Here’s a screenshot of the 3d model, which, fortunately, looks exactly like the real thing after I finished building it. Ah, the miracles of science!
Printing the Parts
The stl files can mostly be printed in the orientation that they are in, however two files should be rotated 180 degrees on the x-axis so that they can be printed without major supports. These two pieces are Center – Board Cover – Top.stl and Center – Common Drink Channel.stl. Additionally, Center – Pump Holder.stl should be printed flat by rotating it 90 degrees so that no support pieces are needed. You will need to turn on printing with supports to ensure that the holes where we will be inserting the 5/16″ steel rods are printed to the right size.
One more thing that has been brought to my attention: the .stl files are may be 10x smaller than they should be in your 3d printing software. If that’s the case, you will need to scale up the objects 10x in all dimensions. It seems to happen regardless of the 3d software that I use when I convert to .stl. No idea why.
The Peristaltic Pumps
What is a peristaltic pump? If the word sounds familiar to you, it’s because you most likely heard of peristalsis in one of your biology classes at some point in time. Peristalsis is the system that your body uses to swallow food. Your throat muscles contract and relax in a way to create a waveform that pushes food in your throat down into your stomach. Peristaltic pumps work on the same principle, albeit with a slightly different execution. The clear plastic tube extends through the pump, and rollers propelled by a DC motor create a waveform that pushes liquid through the tube. Peristaltic pumps are safe and hygienic because liquid never actually contacts any part of the pump; only the plastic tubing is ever in contact with the liquid.
The peristaltic pumps come with some very short plastic tubing. This is obviously inadequate for our current application, so we’ll have to replace the plastic tubing. This requires us to take apart the pump. Fortunately, this is not a hard thing. Instead of trying to explain it, you can view the following video to figure out how it is done.
Soldering
Before connecting any wires, you’ll want to do all of the soldering. You’ll have to solder the 5.5mm x 2.1mm coaxial power connector to two jumper wires, one for the positive lead and one for the negative lead. Plug in your 12V DC power supply to the wall, then plug the coaxial power connector into the DC power supply. Use your multimeter to find out which lead is positive and negative by placing the probes on two of the leads until you find that the multimeter says 12V; those are you positive and negative leads (if it says -12V, then you’ve got the positive and negative leads switched). Unplug the coaxial power connector. Strip two wires and solder one to each of the coaxial power connector’s leads. After you’re done soldering, wrap any exposed metal around the leads in electrical tape.
Next, you’ll want to solder wires to the leads of the peristaltic pumps. The positive lead of the pump should be labeled, so you should not need to guess. If it is not labeled, you will just need to make note of which way the pump is turning and make sure that all of them are turning in the same direction. Don’t worry about the polarity of the leads on the pump breaking anything, since connecting them backwards will just make the pump go in the opposite direction. However, I want to emphasize that you’ll probably want to ensure all of the pumps are pumping clockwise (if they are facing you; you can see through the tiny circle in the middle which direction they are pumping when turned on). After this is done, once again wrap the leads in electrical tape.
Wiring
Here’s where it gets a little bit tricky. The actual wiring is not too complicated, but it requires a little bit of finesse due to the confines of space that we are working with. Since we are fitting everything on a single breadboard, we need to ensure everything is placed in the right spot.
In case you haven’t used a breadboard in a while, each of the numbers running down the breadboard indicate an individual node. The center divides the two sides, so they are separate nodes. The (+) rail running up the left and right side of the breadboard is one node per side, and it is the same with the (-) rail.
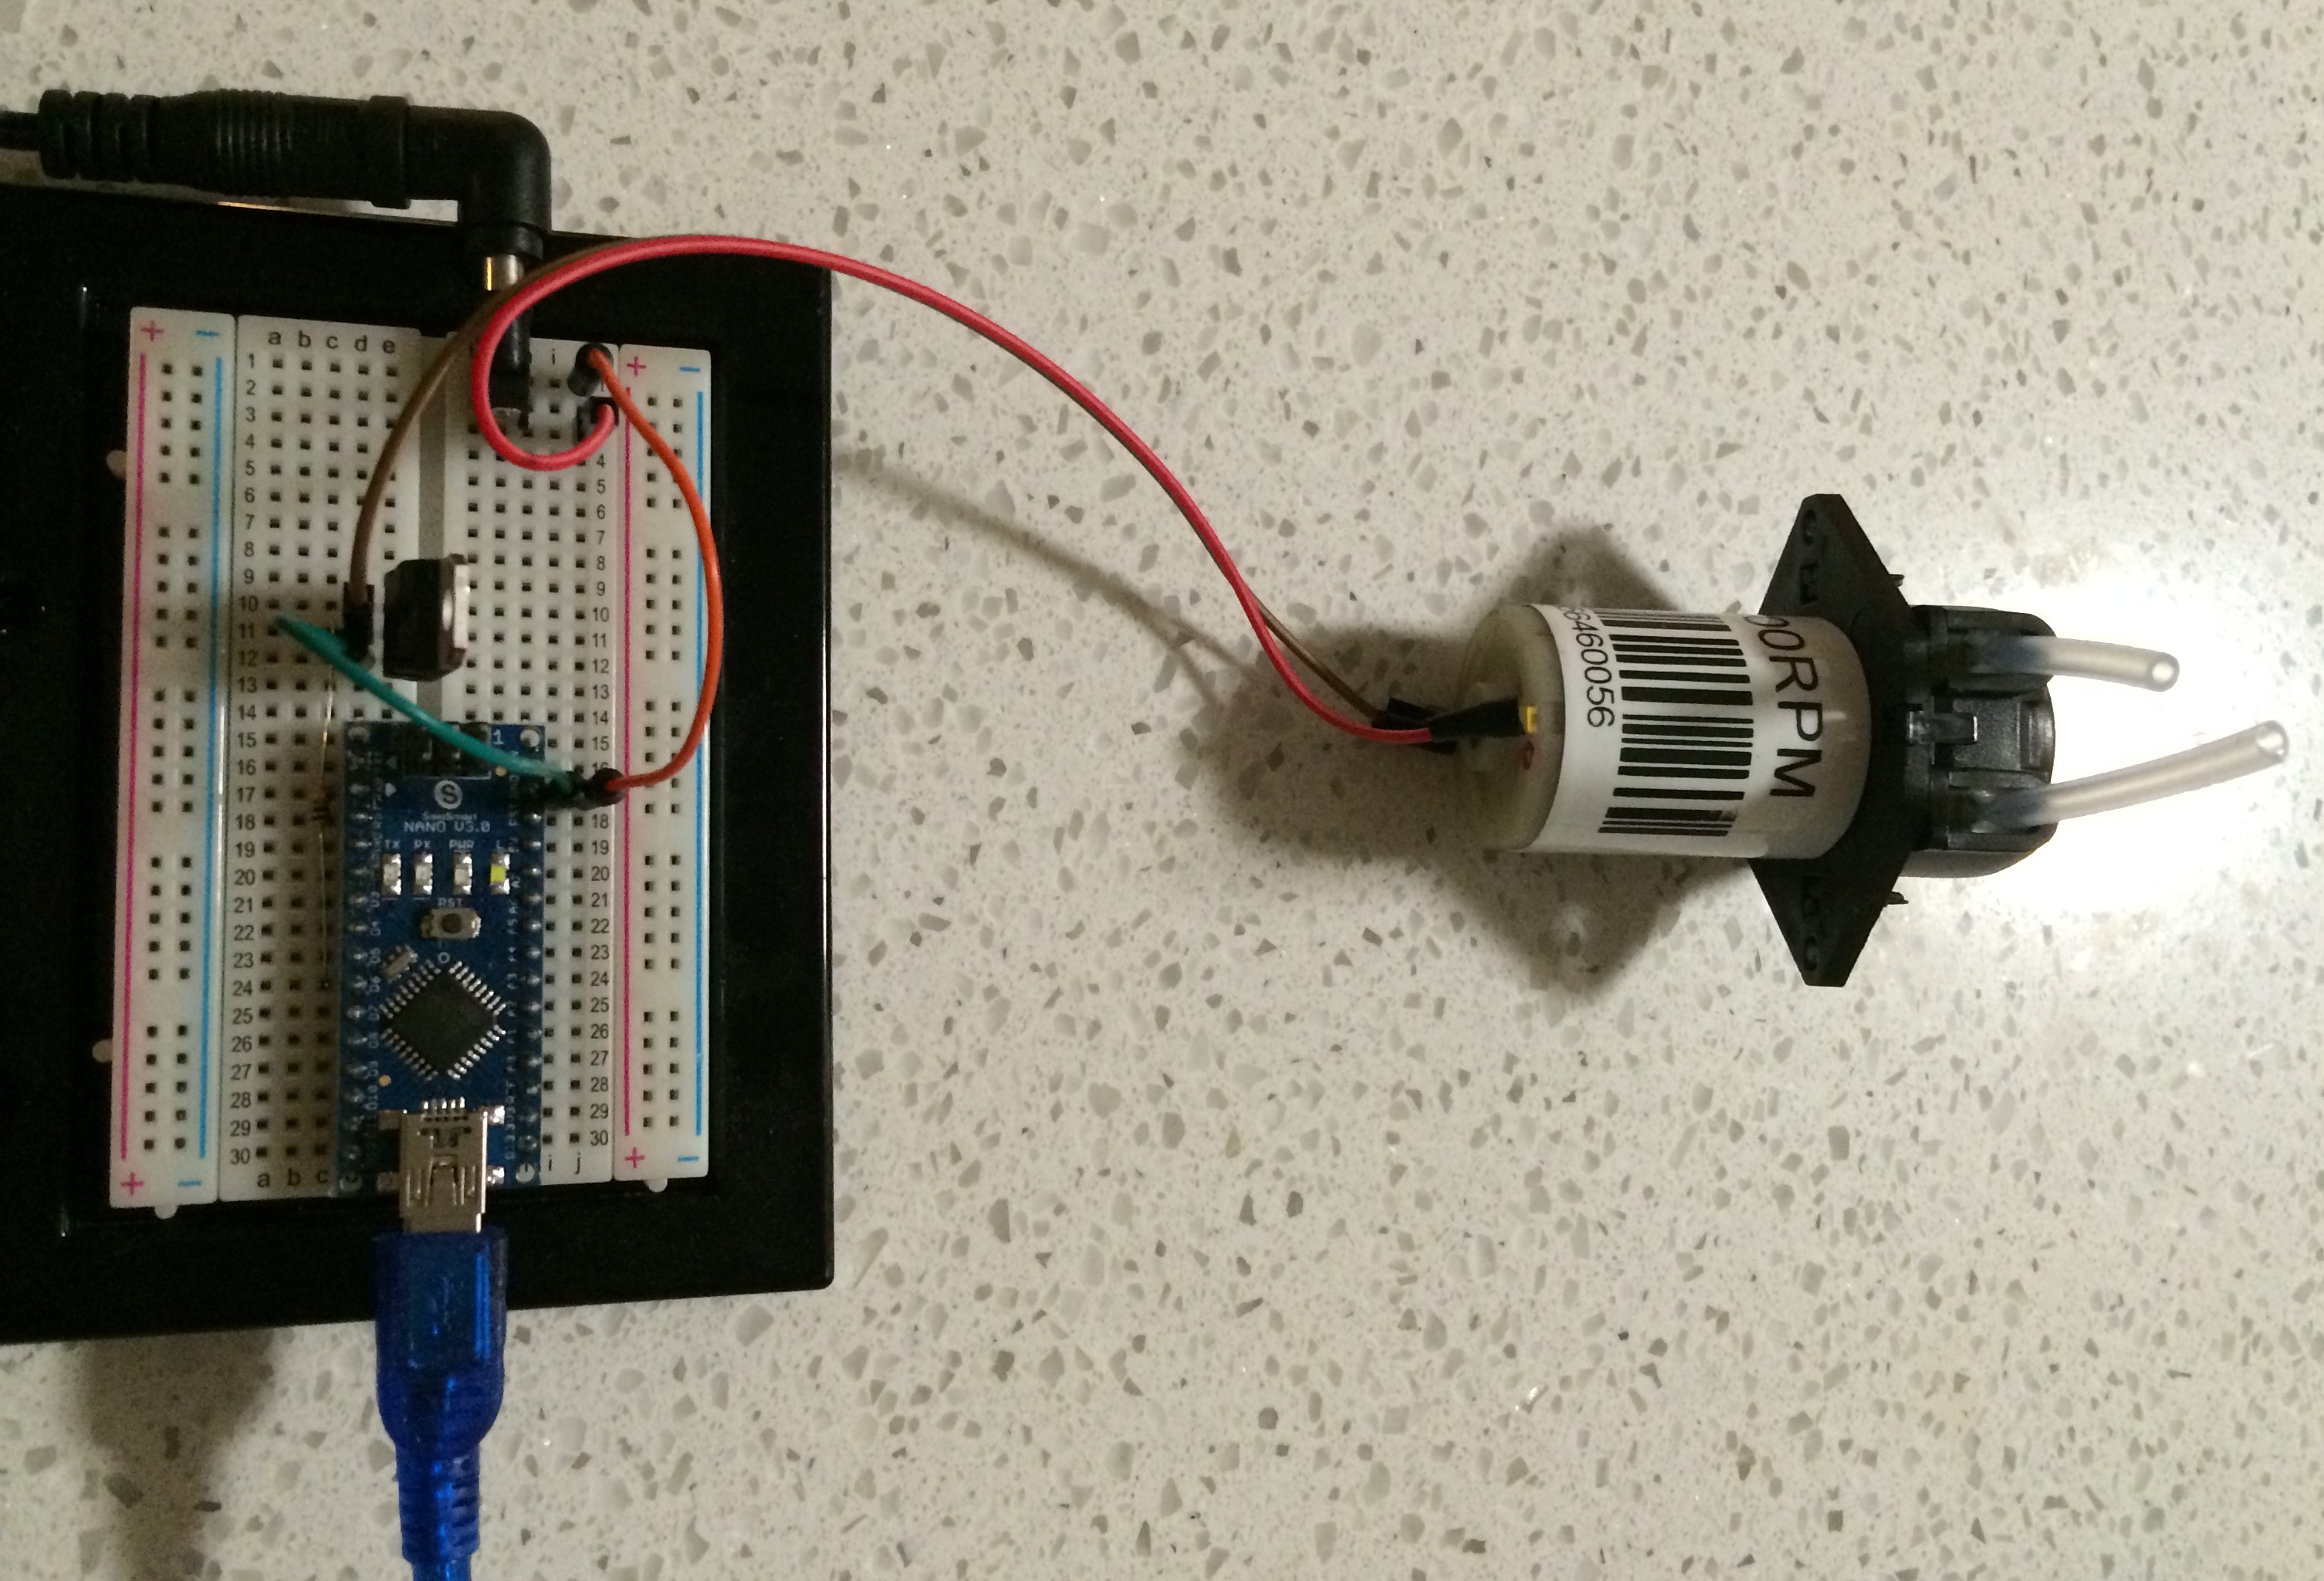
The first thing that you should do before getting any wiring done is to hook up your pumps individually and ensure they are all working. The photo below shows a little bit more complex of a circuit. To check if it’s working, you can just connect the coaxial power connector and pump on a breadboard and plug in the power and ensure that the pump works.
Here’s the wiring diagram for the robot. As you can see, it’s relatively simple:

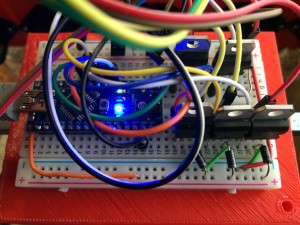
The tough part is that there is not much space, so you may need to have a set of needle-nosed pliers ready to put some of the things in. I recommend adding everything except transistors in first. Here’s how my breadboard looked like after I finished wiring it up:
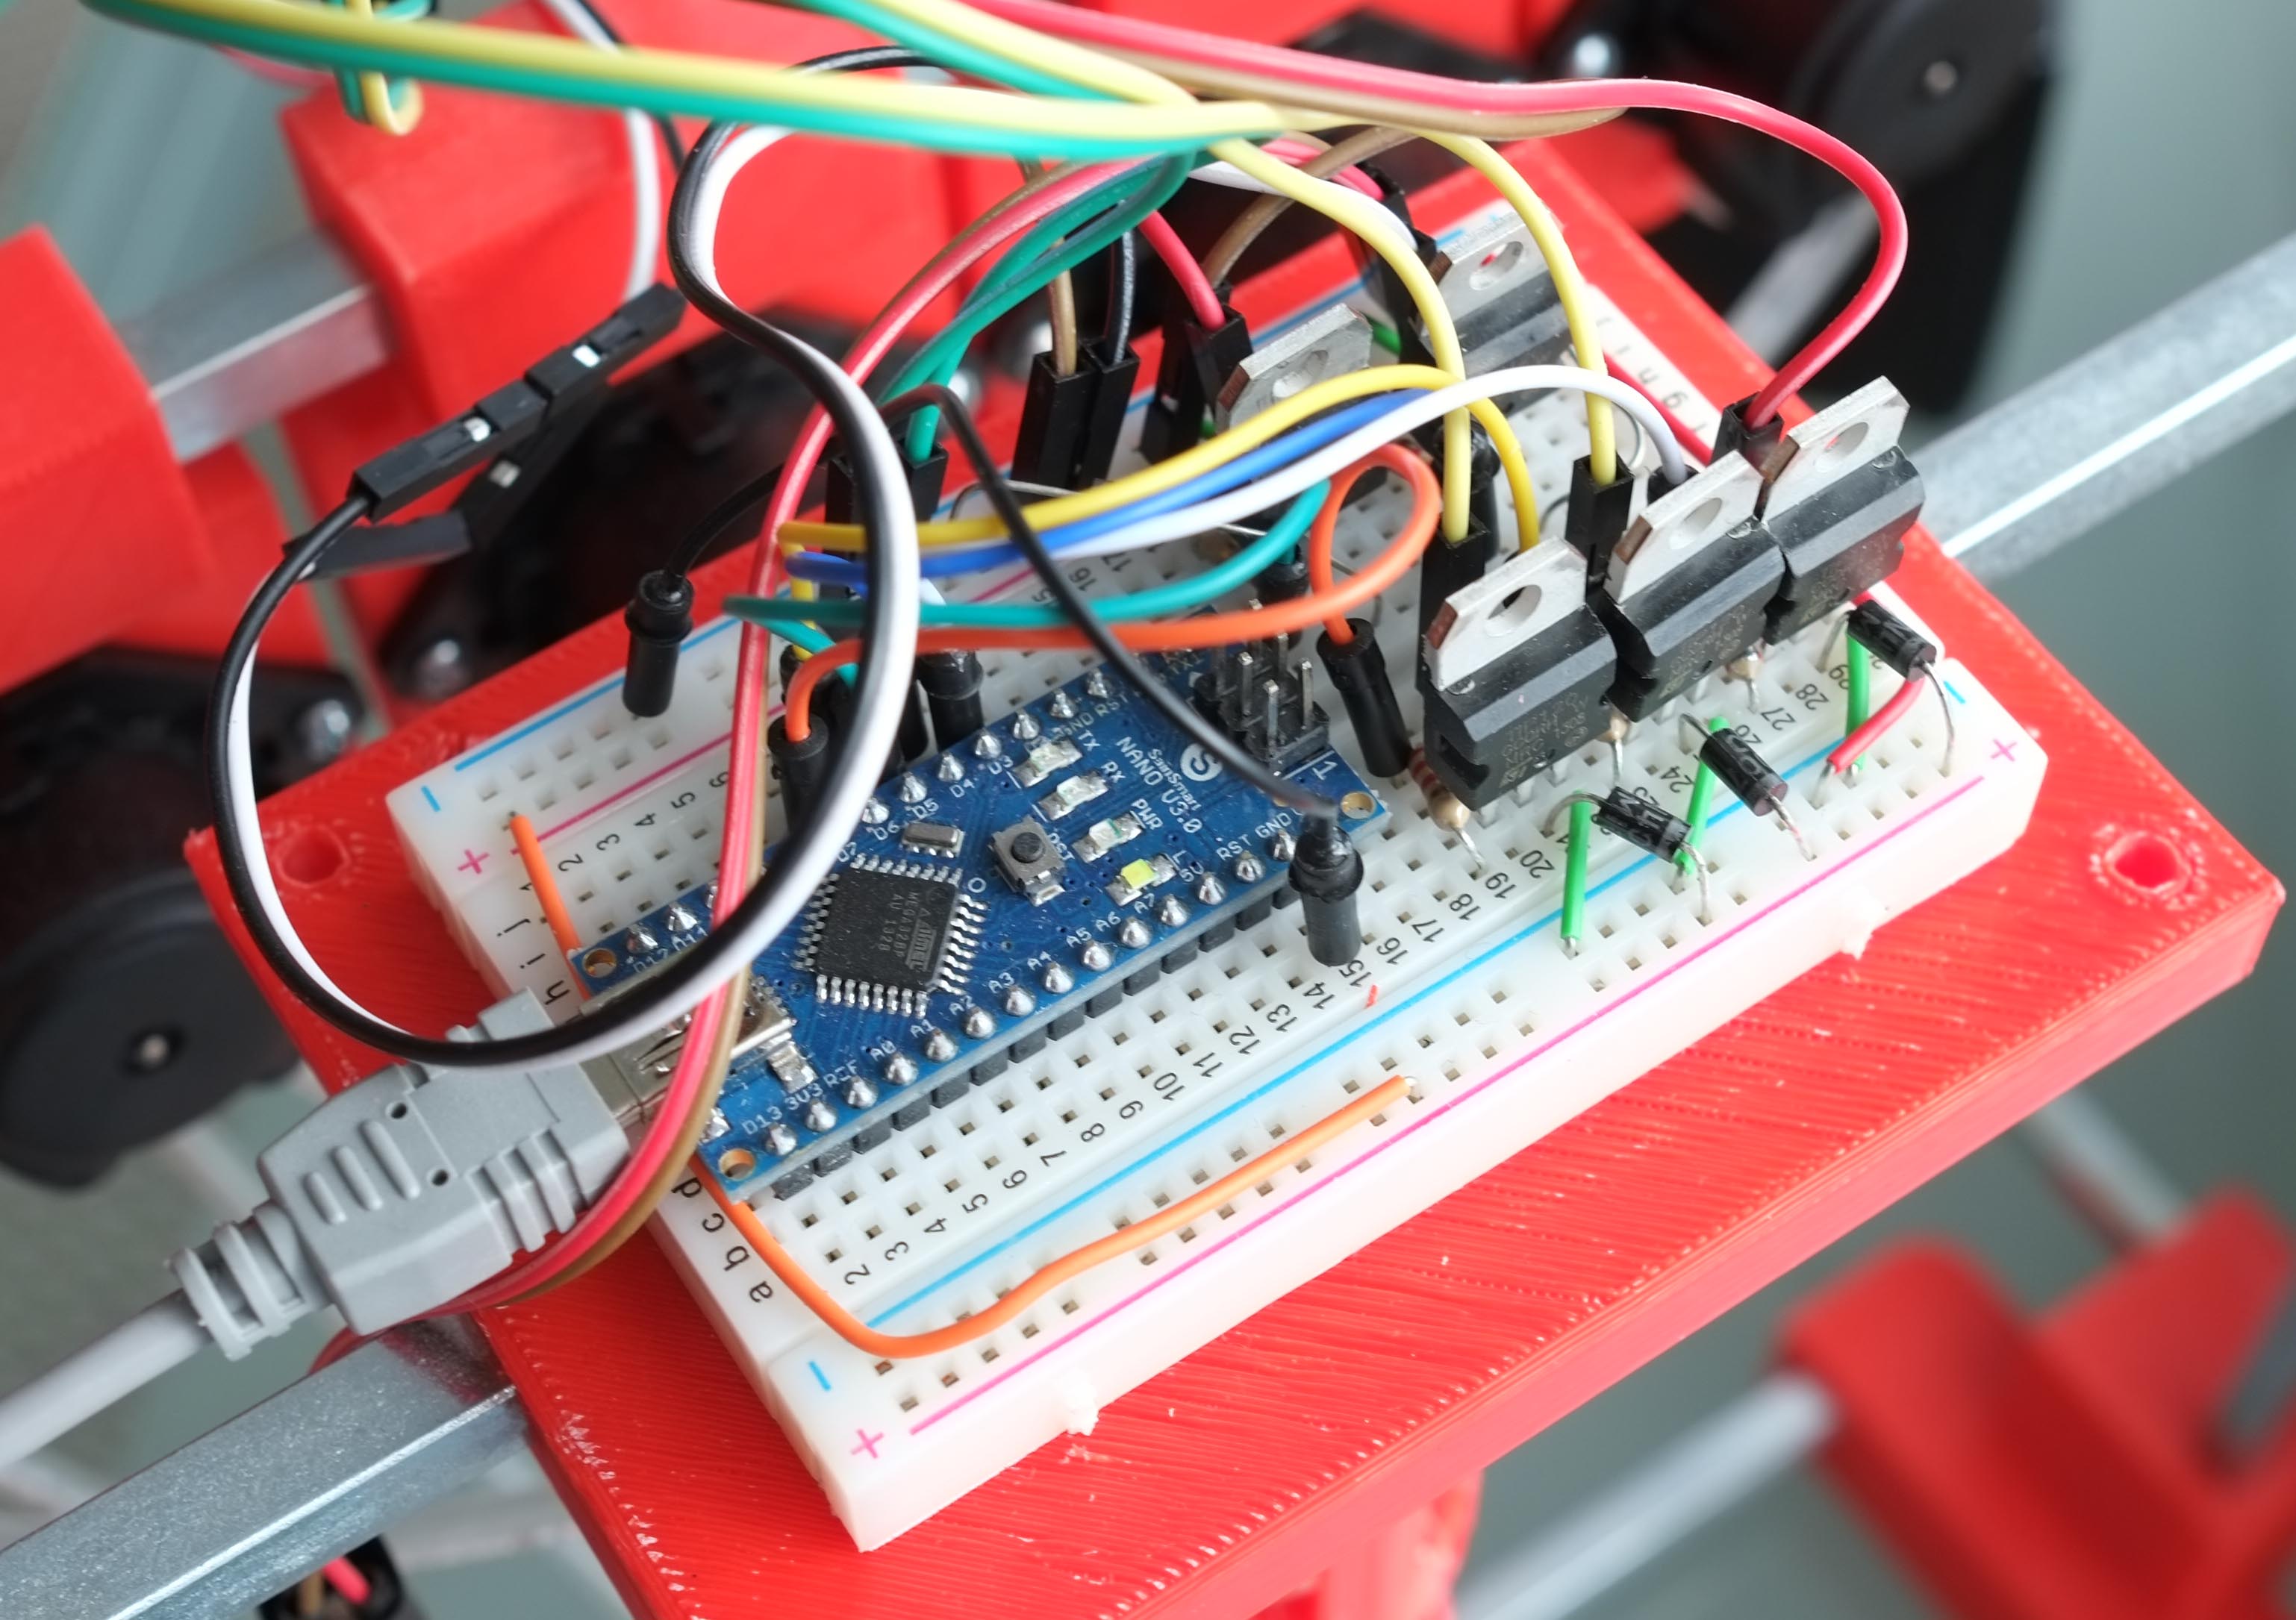
Obviously, yours may look slightly different. However, I recommend placing the Arduino’s nano so that its USB port is on the edge of either side of the breadboard.
Assembly
After printing all of the pieces, remember which piece is which based on the 3d model. Remove all of the support pieces from the 3d printed items with pliers and/or a flathead screwdriver. It is likely that it will be a very tight fit for the steel rods, so you’ll need to push the rods in with a lot of force. I recommend using gloves.
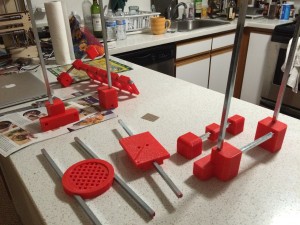
Also, the order in which you assemble the robot IS important. Here’s the order that I used to assemble. Basically, you need to remember to assemble the middle parts first before connecting the left and right sides to them.
- Insert all 5 of the pump holders onto one of the steel rods
- Insert the drink tray into the center of two of the steel rods
- Insert the breadboard holder (bottom piece) into the center of one steel rod
- Assemble the left side, then assemble the right side
- Insert the steel rods for the drink tray, pump holders, and breadboard holder into the left side
- Connect all of the parts of the right side
- Insert each of the pumps into a pump holder and screw them in with two #4 screws each
- Attach the center channel to the top center section using two #6 screws
- Tape the breadboard to the center of the top-middle section, ensuring that the top piece of this section will fit over it
- Wire everything up based on the circuit schematic
- Place the top piece (labeled #BarMixvah in the photo below) over the breadboard, moving wires around until everything fits snugly inside
- Insert two #6 screws through the screw hole and tighten the nuts at the bottom to secure it in place

Well, that’s all for this week. Let me know if you have any questions in the comments and I’ll try my best to answer them.
GitHub link: https://github.com/ytham/barmixvah
Note that the 3D model and stl files are located in the CAD/ folder, and they are printed with the MakerBot Replicator 2X.
Stay tuned for part 2, the software design!
Follow me on twitter: @yujiangtham
Navigation:
- Part 1: Hardware and Electrical Design (you are here)
- Part 2: Software Design
- Part 3: Operation, Caveats, and Further Modifications